Lost your hoodie string? Don’t worry — it’s a common issue, and the fix is easier than you might think. Whether your drawstring disappeared in the wash or got pulled out by accident, this step-by-step guide will help you get it back in quickly using simple household tools.
How to Get a Hoodie String Back In:
To get a hoodie string back in, attach a safety pin to one end of the string, insert it into the hoodie channel, and guide it through until it comes out the other side. It’s a quick fix you can do at home with everyday tools.
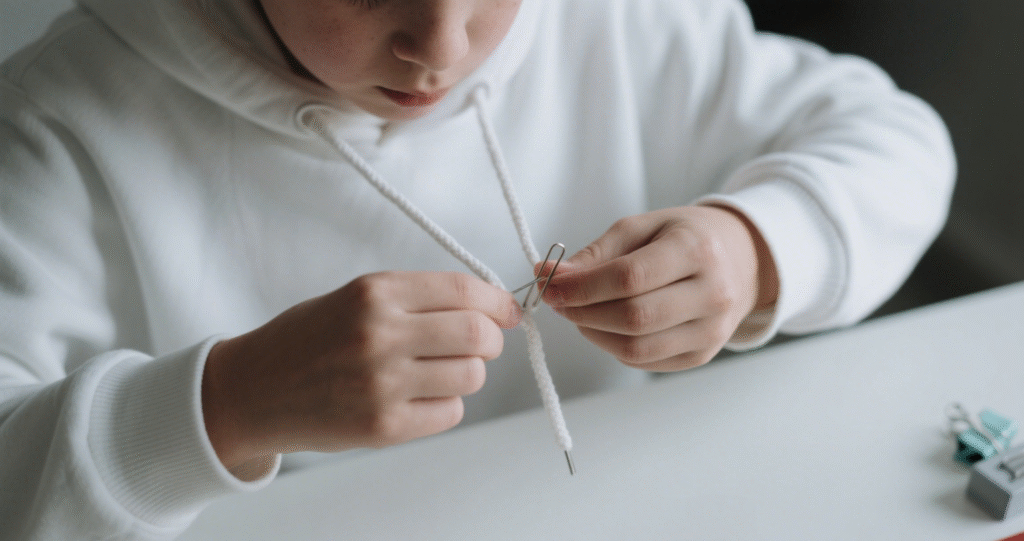
- Attach a safety pin to one end of the string.
- Insert the pin into the hoodie’s drawstring hole.
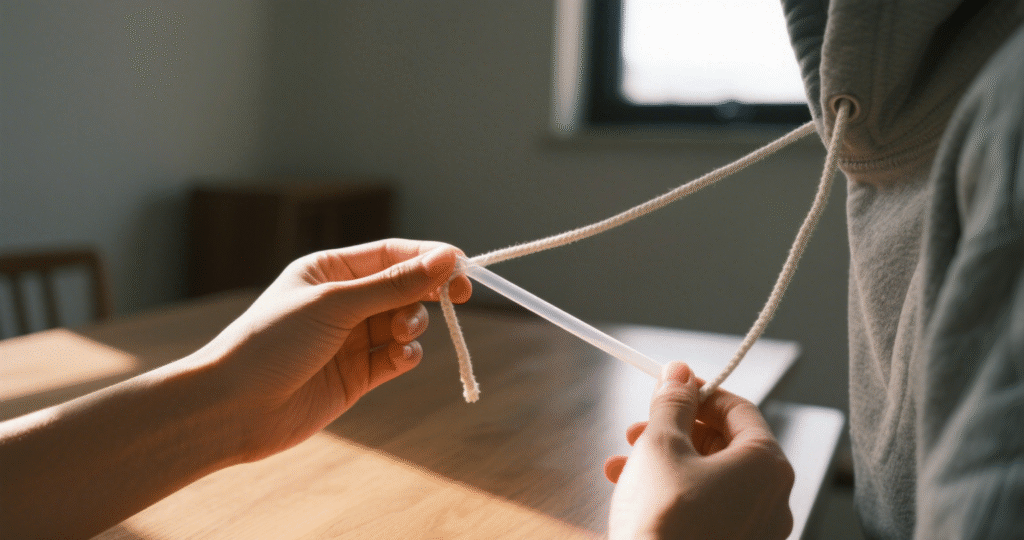
- Gently push the pin through the channel, scrunching the fabric.
- Keep working the pin forward until it exits the other end.
- Remove the pin and adjust the string evenly on both sides.
✅ Tip: Make sure the safety pin is securely fastened to avoid it coming loose mid-way.

Why Do Hoodie Strings Fall Out?
It’s all too common. You’ve just thrown your hoodie into the washing machine or accidentally tugged on the drawstring, and in the blink of an eye, the drawstring has “disappeared”.
Hoodies’ drawstrings are not sewn together, so they can easily slip off during daily exercise, washing, or even just normal wear, which is really annoying. But don’t worry, it’s actually easier than you think to put a slipped drawstring back on. With just a few simple tools and just a few minutes, you can easily restore your hoodie to its original state and solve this problem.
What You’ll Need – Tools You Can Use to Fix a Hoodie String
Here are several everyday items that work great for rethreading a hoodie drawstring:
Safety Pin
A classic go-to. It’s slim, sturdy, and easy to guide through the channel.
Straw
Thread the string through a straw, staple the end shut, then push the straw through the channel.
Bobby Pin
Pinch the string with a bobby pin and carefully guide it through.
Chopstick or Skewer
Wrap the string around the tip and gently push it through the channel.
Hairpin
Similar to a bobby pin but longer — perfect for thick or wide hoodies.
🔹 A bit of patience (it gets easier after the first try!)
🧵 Pro Tip: For thick hoodie strings, use tools with a firm grip and strong tension.
Method 1: Using a Safety Pin (Best Method for Most Hoodies)
This is the most reliable and beginner-friendly technique.
Best for: Most hoodies
Time required: ~5 minutes
Step-by-step:
- Attach a safety pin to one end of the hoodie string.
- Insert the safety pin into one of the drawstring holes on the hood.
- Slowly bunch up the fabric over the pin, pushing it forward through the channel.
- Keep feeding the pin through until it comes out the other end.
- Pull the string all the way through and adjust both ends evenly.
✅ Works for most types of hoodies, joggers, and sweatpants too.
Tip: Use a larger pin for easier grip and movement.
Method 2: The Straw & Pen Casing and Tape Hack
No safety pin? A straw or pen tube works great too!
Best for: Wider hoodie channels
Time required: ~3–5 minutes
Steps:
- Insert the string through a drinking straw.
- Tape the end of the string securely to the end of the straw.
- Feed the straw into the hoodie’s channel.
- Push the straw all the way through and pull it out the other side.
- Remove the tape and straw — you’re done!
Pro Tip: This method works great for kids or those without pins around the house.
Great for thicker strings or if you lost the original drawstring and are using a new one.
Method 3: Using a Wire, Bobby Pin, or Paperclip
When you’re in a pinch, everyday items can save the day.
Best for: Small or tight openings
Time required: ~5 minutes
Instructions:
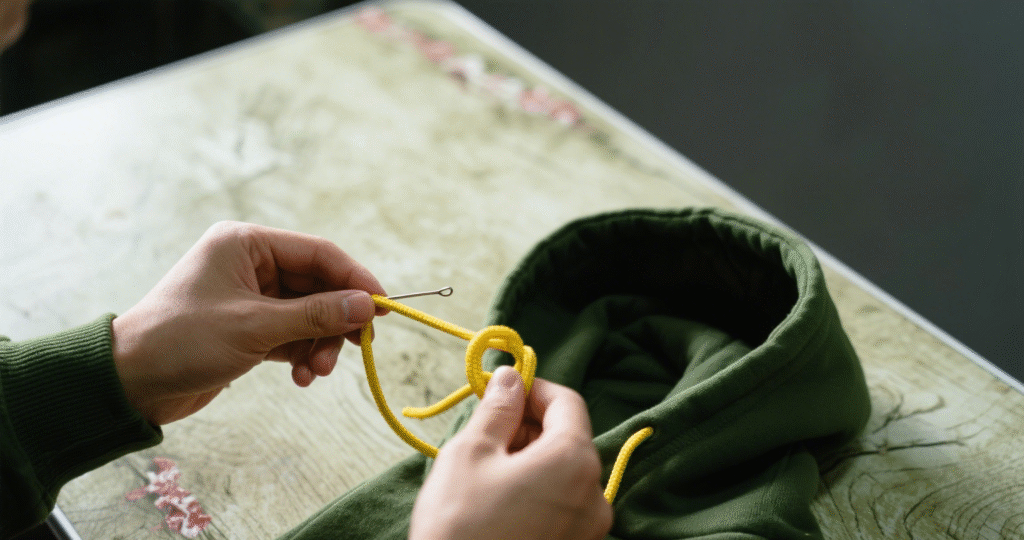
- Straighten a wire, paperclip, or bobby pin.
- Tape or tie the hoodie string to one end.
- Push the tool through the hoodie channel.
- Carefully feed and guide it until it exits the other hole.
- Pull the string completely through and adjust it.
👍 Easy alternative using items from your home or office.
Tip: This method is perfect for narrow hoodie tunnels.

What If You Lost the String? Replace It!
Losing your hoodie string doesn’t mean you have to give up on your favorite hoodie. In fact, replacing it can be an opportunity to get creative and even upgrade the look and feel of your garment.
Choose the Right Replacement
Start by measuring the length of the original drawstring channel. Most hoodie strings are around 40–50 inches long (100–130 cm), but this can vary depending on the style and size of the hoodie. If you’re unsure, use a soft measuring tape or even a shoelace to estimate the length you’ll need.
Best Alternatives to a Hoodie Drawstring
Tip: Match the color to your hoodie for a clean look, or go bold with a contrasting color to add personality.
Shoelaces
- Choose flat or round shoelaces, depending on your hoodie’s original design.
- Ideal length: 36–48 inches for adult hoodies.
- Available in many colors—add a pop of contrast or match your hoodie tone.
Paracord (550 cord)
- Durable, slightly thicker, and adds a rugged or sporty vibe.
- Great for outdoor hoodies or athletic wear.
- Heat-seal the ends with a lighter to prevent fraying.
Soft Cotton Rope or Twine
- Natural look, perfect for casual or oversized streetwear hoodies.
- Lightweight and flexible, but make sure it’s not too thick for the channel.
Thick Yarn or Knitted Cord
- Cozy and colorful—perfect for handmade or fleece hoodies.
- Use a crochet chain or spool-knitted cord for a soft touch.
Fabric Strips
- Cut an old T-shirt into long strips, roll or braid them into a cord.
- Eco-friendly and fully customizable.
There is no need to worry. You can look for professional hoodie suppliers. They can repair the strings of the hoodie. They can also repair any part of the clothing. The professional design team will provide unique new designs. According to your ideas, they will eventually realize them on your hoodie.

Creative Hacks for Hoodie String Repair
When you’re in a pinch and don’t have traditional tools around, these creative DIY methods can save the day. Each of these hacks uses common household items and is perfect for students, travelers, or anyone who loves a quick fix.
- Staple + Straw Trick: Thread string into a straw, fold the end, and staple shut for easy guiding.
- Tape & Chopstick: Tape the string tip to a chopstick for a sturdy push.
- Zip Tie Method: Thread the string around a zip tie and pull it through with ease.
These hacks are perfect for travelers or dorm life when supplies are limited!
Frequently Asked Questions (FAQ)
Use a safety pin. Attach it to one end of the string, then feed it through the hood’s channel. Scrunch the fabric along the pin until it exits the other side.
If the string is stuck inside, use a thin object like a wire, chopstick, or pencil to push it toward an opening. Once accessible, reinsert it using a safety pin.
If the string is stuck inside, use a thin object like a wire, chopstick, or pencil to push it toward an opening. Once accessible, reinsert it using a safety pin.